Out of the box workflows are great, and the biggest
reason they are so great is because you don't have to write them.
However, if you have business users like the ones I deal with, there
will always request a minor tweak to an out of the box workflow, and
then they give me puzzled looks when I give them a time estimate in
weeks. In SharePoint 2007, out of the box workflows were pretty much
sealed. They were what they were and you could not change them. In
SharePoint 2010, however, you have the ability to tweak out of the box
workflows and change them to your heart's content.
Let's take the example of the out of the box
workflow. Say that you want to perform a minor tweak to an out of the
box workflow. Specifically, the tweak you wish to do is that you don't
want to display the CC Field in the initiation form. Also, since I'm not
too fond of the colors used on the initiation form let's also change
the colors of the inititiation form.
You have the ability of customizing out of the box
workflows using SharePoint Designer. Open your site collection in
SharePoint Designer and look at all the workflows available within this
site. You should see the "Approval - SharePoint 2010" workflow available
and you can double-click it and start editing it right through
SharePoint Designer. What I like to do is to right-click an existing out
of the box workflow definition, choose to make a copy, and then modify
the copy. This way the original workflow definition remains intact, so
someone else can use it later.
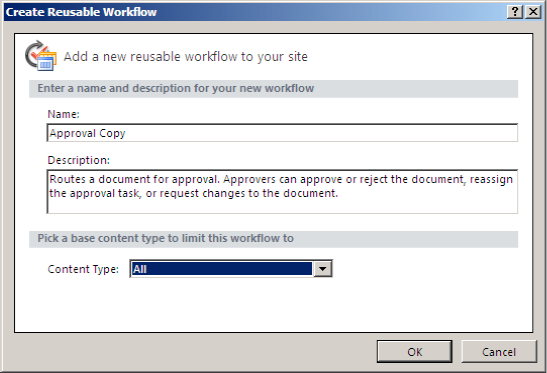
Therefore, right-click the "Approval - SharePoint
2010" workflow template and choose "Copy and Modify". By doing so,
SharePoint Designer will ask you for a name of the copy, call it
"Approval Copy". Also, SharePoint Designer will ask you which content
type you want to limit this workflow to. This can be seen in Figure 1.
What you're doing here is creating a reusable
workflow. This reusable workflow can be exported as a solution package.
It can be imported into Visual Studio for further tweaking or it can be
deployed across various other farms. When you create a reusable workflow
through SharePoint Designer, you associate it with a content type. By
associating a reusable workflow to a content type, you are essentially
defining the structure of information that this workflow can always
assume will be present. Therefore, if you associate the workflow with
announcements, you can be sure that there will be a field called
"Expires" because every announcement has an "Expires" field in it.
Any content type that inherits from announcement will
be able to use your reusable workflow. Therefore, in order to create a
globally reusable workflow, you should associate with the item content
type. By doing so, you can be guaranteed that only the title field is
present. This workflow can then be associated with any content type,
since every content type eventually inherits from the item content type.
For this example, choose the content type to be "All"
and click OK. The next screen will show you the workflow logic written
out as a series of logical steps and conditions. This can be seen in Figure 2.

Let's say that at the very end of this workflow you
wish to log to the history list that the workflow has finished
executing. If you pay close attention to this logic tree, you will see
an orange horizontal blinking cursor. By either using your cursor keys
or by clicking the mouse left button, you have the ability to move that
orange cursor. Take that cursor to the very end of the workflow, as
shown in Figure 3.

With the cursor double-click it using the left button
of your mouse. After a text box appears prompting you to start typing
to search. Start typing "Log" and you will see that SharePoint Designer
has narrowed your search to the Log to History list activity, as shown
in Figure 4.

As prompted, hit enter to insert the necessary
activity and then configure it to log a suitable message into the
workflow history list. This can be seen in Figure 5.

Go ahead and save this workflow. Now draw your
attention to the ribbon, which shows a button that says "Export to
Visio". Clicking on this button will allow you to export a .vwi file.
Save this .vwi file at a convenient location on the disk.
Next, start Visio and create a new diagram under the
flowchart category, based on the "Microsoft SharePoint Workflow"
stencil. This visio diagram allows a business analyst to craft up an
entire workflow from scratch entirely in Visio. This can be
imported/exported back and forth from SharePoint Designer as many times
as you please. You can experiment by creating a brand new workflow
yourself using the Visio stencil, but I'm going to import the .vwi file
you had exported from SharePoint Designer earlier. In Visio, go to the
flowchart category and create a new diagram based on "Microsoft
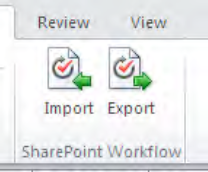
SharePoint Workflow". Once the diagram is created, in the ribbon under
the process tab, look for the import and export buttons, as shown in Figure 6.
Click import and choose to import the .vwi file you
had exported from SharePoint Designer earlier. You should see a
graphical representation of your workflow in Figure 7.
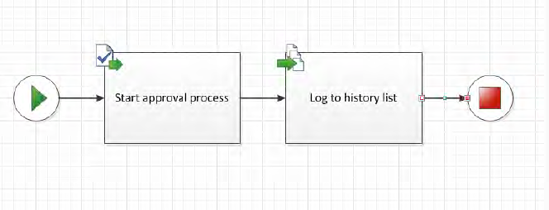
For a moment, I'd like you to stop here and compare
this graphical representation with the Visio Services representation you
saw earlier. You will see that the log to history list block is new.
Therefore, this diagram accurately reflects my intent.
Again, I leave it up to you to experiment with this
Visio stencil and the various workflow actions and conditions you can
use in Visio and give those SharePoint flowcharts life as SharePoint
workflows with SharePoint Designer.
Now come back to SharePoint Designer and let's make
some additional tweaks to the approval copy workflow you were working
on. There are two additional things I'd like to do to this workflow. I'd
like to tweak the look of the infopath form and I'd like to eliminate
the CC Field from the initiation form. In order to do so, open the
approval copy workflow in SharePoint Designer and click the Initiation
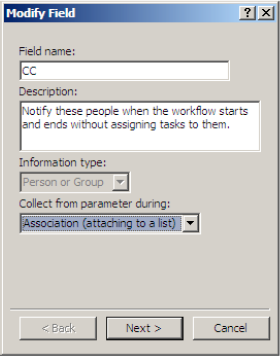
Form Parameters button in the ribbon. This form will allow you to add,
modify, or remove various parameters for the workflow, and also choose
which ones appear in the initiation form, association form, and which
appear in both. Select the CC variable and choose to modify it by having
it appear only in the association form. This can be seen in the Figure 8.
The variables specified over here will also
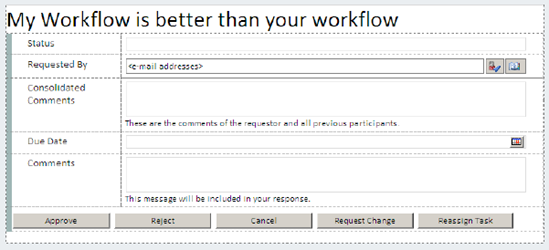
automatically generate the necessary InfoPath forms for you. Now
double-click the InfoPath form under the "Forms" section of the workflow
and make some modifications to the InfoPath form. Your modified infpath
form should look like Figure 9.
Save this infopath farm anywhere on your machine.
Then, publish it by clicking on the quick publish button next to the
save button in the title bar of InfoPath.
Your modifications to the workflow are now complete.
Click the edit workflow link one more time and from the ribbon choose to
save and publish. Publishing the workflow will process all the
necessary files, including the workflow visualization and the solution
package, and will make the workflow available on the SharePoint site.
Just like before, create a new association to the "Approval Copy" workflow and run the workflow. Note the following:
The CC Field is no longer being asked for in the initiation form.
The workflow visualization now shows a log to history list activity at the end of the workflow.
The task form reflects the changes you had made previously.
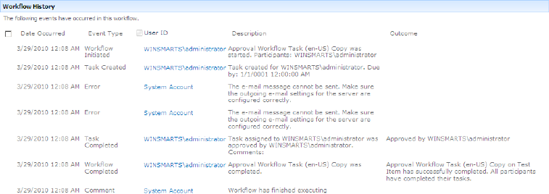
In the workflow history, you should see a new comment saying "Workflow has finished executing", as shown in Figure 10.